
Handwritten Multi-digit String Segmentation and Recognition using Deep Learning
Introduction
Usually, the recognition of the segmented digits is an easier task compared to segmentation and recognition of a multi-digit string. It is often considered as a "Hello World!" example of machine leaning.
In this post, we will learn how to develop an application to segment a handwritten multi-digit string image and recognize the segmented digits.
The handwritten digits recognition process passes through three steps preprocessing, segmentation of image into individual digits, and recognition of each digit.

The preprocessing step includes conversion to grayscale, binarization, and dilation.

Requirements:
- Java Development Kit (JDK), you can get it from here.
- Netbeans, you can get it from here.
- Deeplearning4j, Open-Source Deep-Learning Software for Java and Scala.
- Javacv, Java wrapper to Opencv, FFmpeg, and many more.
- Source Code, you can get it from https://github.com/tahaemara/multi-digit-segmentation-and-recognition.
Steps:
- Load image
- Convert image to grayscale Assigning each pixel to a value of the range of monochromatic shades from black to white to represent its amount of light.
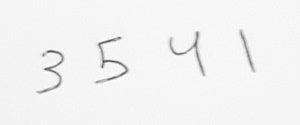
- Binarise image. Assigning each pixel to only two possible colors typically black and white.
- Invert image color. Assigning each pixel with its value after applying not operator such that dark areas in the input image become light and light areas become darkRef.
- Dilate image. Assigning each output pixel to the maximum value of all the pixels in the input pixel's neighborhood. In a binary image, if any of the pixels is set to the value 1, the output pixel is set to 1Ref. This increases the thickness of the digits.
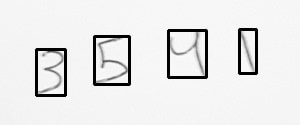
- Segment string image into individual digits.
- Sort digits (contours) from left to right.
- Add black border to each digit, this increases the accuracy of classification.
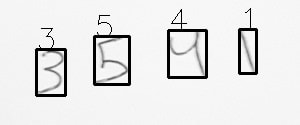
- Recognize each digit Each digit will be recognized by a model generated by a Lenet architecture trained with MNIST dataset. This model is generated by class NetworkTrainer in the github repository .
/*Load iamge in grayscale mode*/
IplImage image = cvLoadImage(IMAGEPATH, 0);
/*imwrite("samples/gray.jpg", new Mat(image)); // Save gray version of image*/ 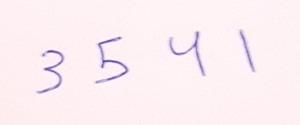
/*Binarising Image*/
IplImage binimg = cvCreateImage(cvGetSize(image), IPL_DEPTH_8U, 1);
cvThreshold(image, binimg, 0, 255, CV_THRESH_OTSU);
/*imwrite("samples/binarise.jpg", new Mat(binimg)); // Save binarised version of image*/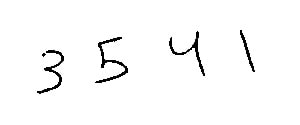
/*Invert image */
Mat inverted = new Mat();
bitwise_not(new Mat(binimg), inverted);
IplImage inverimg = new IplImage(inverted);
/*imwrite("samples/invert.jpg", new Mat(inverimg)); // Save dilated version of image*/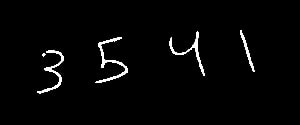
/*Dilate image to increase the thickness of each digit*/
IplImage dilated = cvCreateImage(cvGetSize(inverimg), IPL_DEPTH_8U, 1);
opencv_imgproc.cvDilate(inverimg, dilated, null, 1);
/*imwrite("samples/dilated.jpg", new Mat(dilated)); // Save dilated version of image*/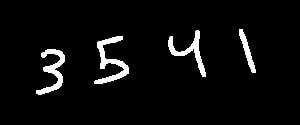
CvMemStorage storage = cvCreateMemStorage(0);
CvSeq contours = new CvSeq();
cvFindContours(dilated.clone(), storage, contours, Loader.sizeof(CvContour.class),
     CV_RETR_EXTERNAL, CV_CHAIN_APPROX_SIMPLE, cvPoint(0, 0));
CvSeq ptr = new CvSeq();
List rects = new ArrayList<>();
for (ptr = contours; ptr != null; ptr = ptr.h_next()) {
    CvRect boundbox = cvBoundingRect(ptr, 1);
    Rect rect = new Rect(boundbox.x(), boundbox.y(), boundbox.width(), boundbox.height());
    rects.add(rect);
    cvRectangle(image, cvPoint(boundbox.x(), boundbox.y()),
    cvPoint(boundbox.x() + boundbox.width(), boundbox.y() + boundbox.height()),
    CV_RGB(0, 0, 0), 2, 0, 0);
} 
Mat result = new Mat(image);
Collections.sort(rects, new RectComparator());
RectComparator Class
import java.util.Comparator;
import org.bytedeco.javacpp.opencv_core;

 public class RectComparator implements Comparator {

        @Override
        public int compare(opencv_core.Rect t1, opencv_core.Rect t2) {
            return Integer.valueOf(t1.x()).compareTo(t2.x());
        }
} 

 for (int i = 0; i < rects.size(); i++) {
            Rect rect = rects.get(i);
            Mat digit = new Mat(dilated).apply(rect);
            copyMakeBorder(digit, digit, 10, 10, 10, 10, BORDER_CONSTANT, new Scalar(0, 0, 0, 0));
            resize(digit, digit, new Size(28, 28));
            NativeImageLoader loader = new NativeImageLoader(28, 28, 1);
            INDArray dig = loader.asMatrix(digit);
            INDArray flaten = dig.reshape(new int[]{1, 784});
            INDArray output = restored.output(flaten);
            /*for (int i = 0; i < 10; i++) {
            System.out.println("Probability of being " + i + " is " + output.getFloat(i));
            System.out.println("\n");
            }*/
            int idx = Nd4j.getExecutioner().execAndReturn(new IAMax(output)).getFinalResult();
            System.out.println("Best Result is : " + DIGITS[idx]);
            opencv_imgproc.putText(result, DIGITS[idx] + "", new Point(rect.x(), rect.y()), 0, 1.0, new Scalar(0, 0, 0, 0));//print result above every digit
            /*imwrite("samples/digit" + i + ".jpg", digit);// save digits images */
        }
Finally
You can build upon this code a lot of real apps like "Mobile Scratch Card Digits Recognition" and more.
References
Further Reading
Subscribe to Our Mailing List
Share: